Raised Bed Garden Soil Ratios: A Better Mix for Vegetables
A 4 × 8-foot raised bed filled to 12 inches holds 32 cubic feet of soil, and a sensible starting mix is about 40% mineral soil, 40% mature compost, and 20% coarse organic material. That works out to roughly 12.8 cubic feet of each main fraction and 6.4 cubic feet of the aerating fraction. It is a starting point, not a magic recipe: the right raised bed garden soil depends on how fine the compost is, what lies underneath the bed, how much rain your site receives, and whether the bed is 6 inches deep or 18.
The mistake to avoid is filling the whole structure with compost. Compost is valuable because it changes soil biology and structure, but it is not a complete substitute for mineral soil. Use the ratio below as a way to diagnose and build a root zone, not as a shopping list that overrides what your materials are already doing.
Start with a 40:40:20 Mix—and Adjust It for Your Existing Soil
For a typical vegetable bed sitting on the ground, begin with:
- 40% screened topsoil or mineral soil: the bulk, weight, and mineral fraction.
- 40% mature compost: decomposed organic matter with some nutrient-holding capacity and biological activity.
- 20% aged bark fines, leaf mold, or another stable coarse organic fraction: a way to introduce a range of pore sizes without relying on a bed of fine compost.
Those percentages are easiest to manage by volume. For the 4 × 8-foot bed above, measure about 12.8 cubic feet of mineral soil, 12.8 cubic feet of compost, and 6.4 cubic feet of aged bark fines or leaf mold. In practice, bags and bulk deliveries rarely divide so neatly, so round to the nearest available quantity and mix thoroughly on a tarp or in low lifts inside the bed.
A 12-inch bed has 32 cubic feet of internal volume before allowing for headspace. If you leave 1 inch below the rim for mulch and settling, the fill volume is about 29.3 cubic feet rather than the full 32. For deeper beds or irregular shapes, use the volume method explained in How Much Soil Does a Raised Bed Need? Bed Volume Calculations instead of guessing from the bed’s footprint.
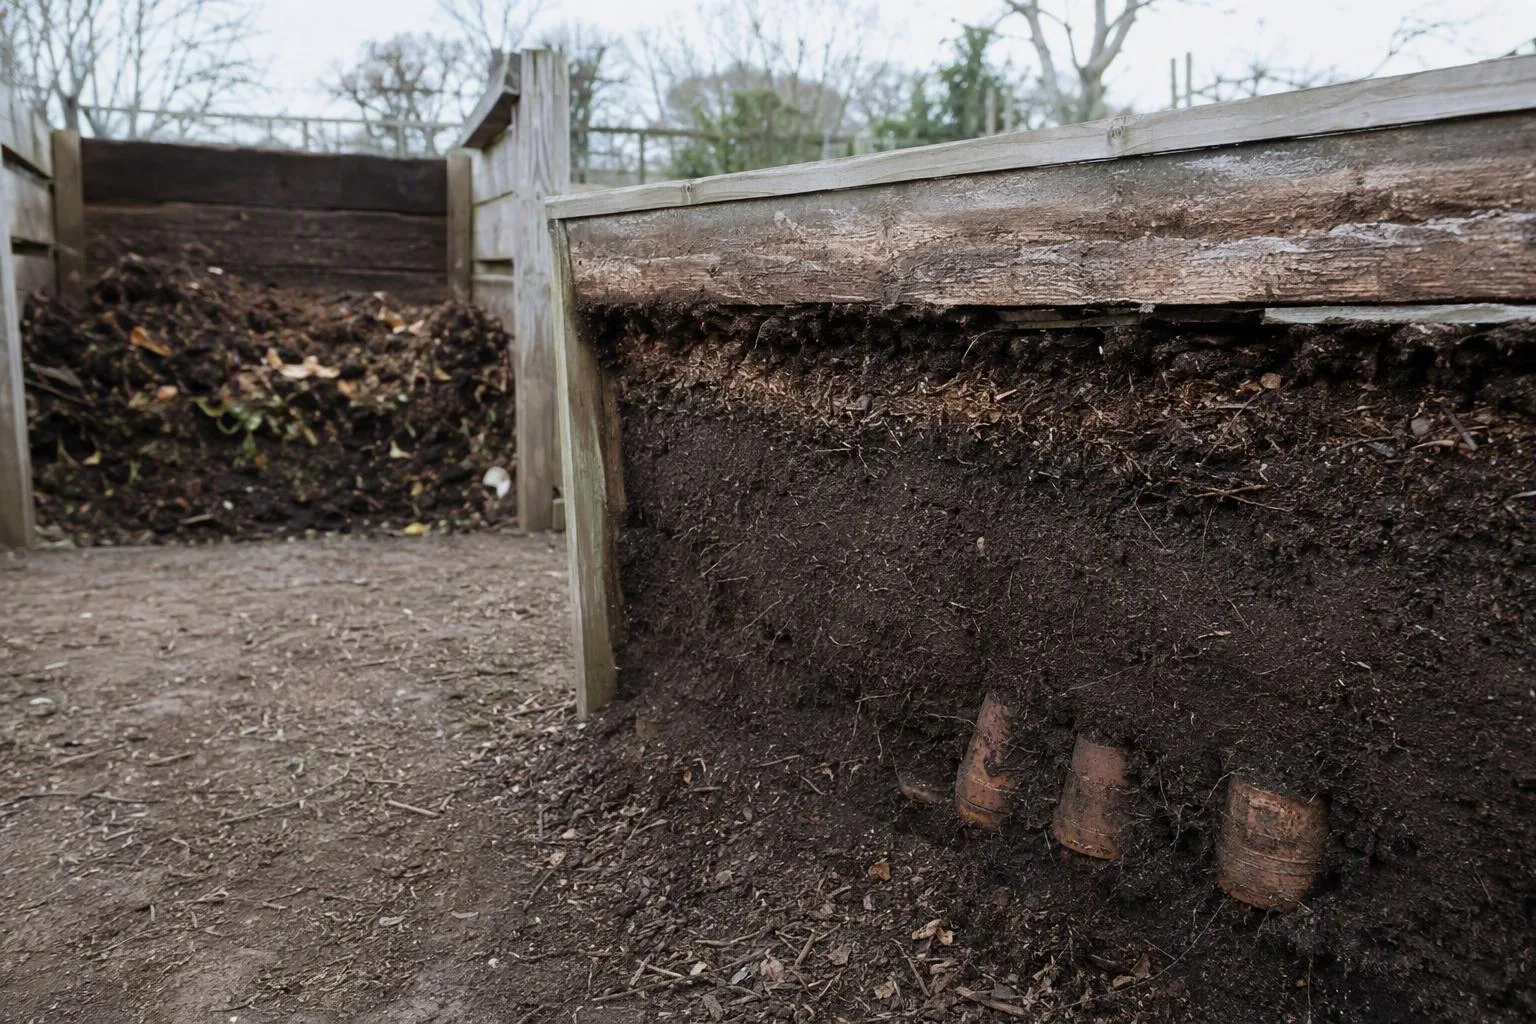
Visual intent: The cross-section should make the mix proportions and the connection to native soil understandable at a glance.
Alt text: Raised bed cross-section showing mineral soil, mature compost, coarse organic material, and native soil below.
The native soil underneath changes the recommendation. A bed only 6 to 8 inches deep is still partly a top layer over the existing ground, so loosen compacted soil beneath it and blend a little of the new material into the upper native layer where practical. A deep bed gives roots more independence, but the bottom still affects drainage if the native soil is dense clay or remains wet after rain.
My judgment: start closer to 40:40:20 than to a “100% compost” fill, then correct the mix after you have observed it through one wet spell and one dry spell. A recipe that looks perfect on delivery day can settle, crust, or stay saturated once irrigation and weather expose its pore structure.
The Ingredients Do Different Jobs: Texture, Fertility, and Root-Space Air
Think of a raised bed soil mix as a small physical system. Roots need water, oxygen, nutrients, anchorage, and enough uninterrupted space to expand. Each ingredient affects several of those conditions at once, which is why replacing one material with another by weight is a poor shortcut.
Mineral soil supplies structure and buffering
Topsoil or another suitable mineral soil supplies sand, silt, clay, and small amounts of stable organic matter. It gives the bed weight, helps hold water between irrigations, and provides a larger mineral reservoir than organic material alone. The word “topsoil” is not a guarantee of quality, though. A delivery can contain a high proportion of fine particles, stones, weed roots, or very little actual topsoil. Inspect it before the truckload disappears into the bed.
Take a handful when it is slightly damp. It should form a loose ball when squeezed but break apart with modest pressure. If it smears into a shiny ribbon or stays in a hard lump after drying, the fine fraction may be dominating. If it falls through your fingers like dry dust and cannot hold a ball at all, it may need more water-holding material and organic matter.
Compost feeds the system, but it keeps changing
Mature compost contributes decomposed organic matter, microbial habitat, and nutrients that are released as conditions allow. Its effects are not permanent in the same way that mineral particles are permanent. Microbes continue processing the readily decomposable fraction, so a compost-heavy bed can lose volume and alter its pore structure over time.
Finished compost should smell earthy or neutral, not sharply sour, ammoniacal, or like fermenting grass. It should be dark enough to look substantially decomposed, with only a small amount of recognizable original material. A rough texture is useful; a fine, wet sludge is not. Compost quality and soluble salt levels vary by feedstock and production method, so a product test or soil test is more useful than the word “organic” on a label.
For a closer look at the tradeoff between fertility and excess organic matter, see Compost in Vegetable Gardens: How Much to Add Without Overloading Soil.
Coarse organic material changes pore space
Aged bark fines and leaf mold can add larger pores and reduce the tendency of a fine mix to settle into a dense layer. That benefit depends on particle size and decomposition stage. Very fine bark behaves more like another fine organic amendment. Fresh wood chips are a different material altogether: they are slow to decompose in soil and can temporarily compete for available nitrogen where they are mixed into the root zone.
Perlite and vermiculite can improve a small container mix, but buying enough for a large outdoor bed is usually a poor allocation of money and material. Perlite is light and creates air space, yet it can rise or migrate during cultivation. Vermiculite holds water, but its value is easier to control in containers than across several cubic yards of raised bed soil. Use a structurally sound bulk mix first.
| What dominates the mix | What you may observe | Reasonable correction |
|---|---|---|
| Fine compost and silt | Slow drainage, crusting, or a sour smell when wet | Stop adding fine material; blend in suitable mineral soil and stable coarse material, then reassess drainage |
| Coarse, low-water-holding material | Fast drying and plants wilting soon after irrigation | Add water-holding mineral soil or mature compost and cover the surface with mulch |
| Fresh woody material | Uneven growth or pale new leaves after incorporation | Remove what can be removed, add mature compost only if needed, and avoid fresh chips in the root zone |
| Pure or nearly pure compost | Early lush growth followed by settling, salt stress, or unstable moisture | Blend with mineral soil rather than repeatedly topping up with more compost |
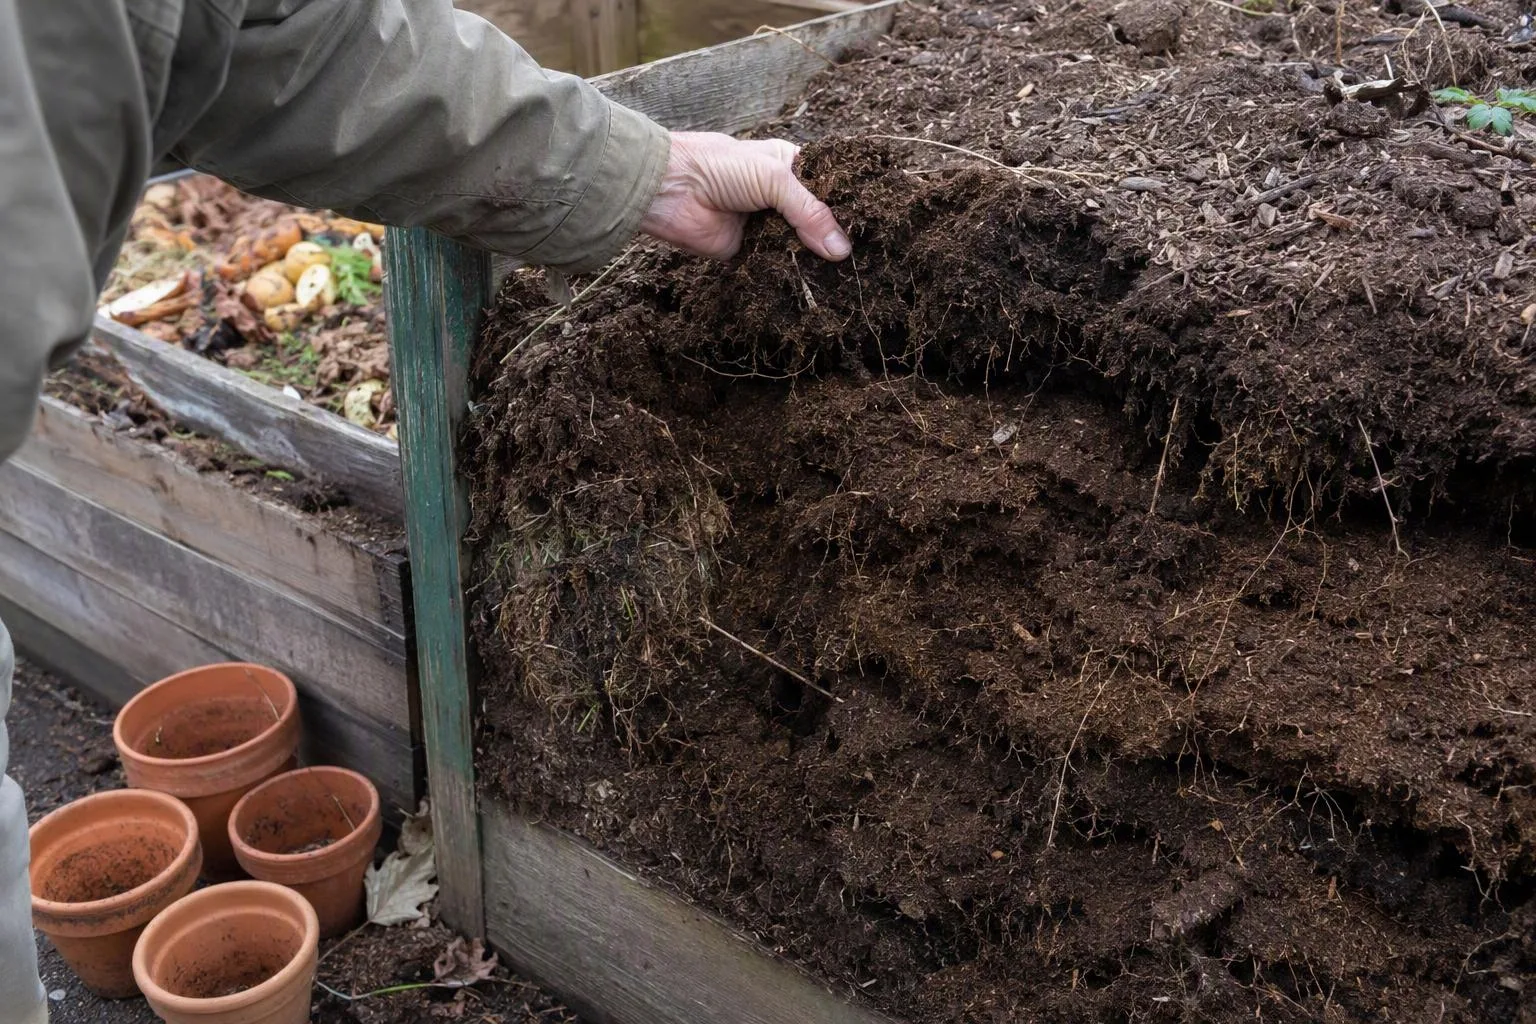
Visual intent: Show the physical differences a gardener can assess without laboratory equipment: crumb, smear, settled fines, and visible coarse particles.
Alt text: Three damp soil samples show crumbly balanced texture, dense wet texture, and fine compost-heavy texture.
Use the Bed’s Symptoms to Change the Ratio, Not a New Product
Don’t respond to every soil problem by buying another amendment. First identify whether the failure is physical, chemical, biological, or simply a watering mismatch.
Standing water or a sour smell: check the bed after a thorough irrigation and again several hours later. If water remains pooled, or if the soil smells like fermentation when opened, inspect the bottom and the material itself. Fine particles can fill the larger pores; a compacted layer beneath the bed can also hold water above it. The first correction is better pore continuity and a check of the native soil, not gravel poured into the bottom.
Rapid drying: if the top few inches become dry quickly and plants wilt even though irrigation reaches the surface, the mix may contain too much coarse, low-water-holding material, or the bed may be exposed to wind and heat. Check moisture below the surface before changing the ratio. Adding mulch often solves the surface evaporation problem more efficiently than adding another truckload of compost.
Pale growth: pale leaves do not identify one cause. Low available nitrogen, root stress from wet soil, high soluble salts, poor root contact, low light, and pests can produce overlapping symptoms. Look at the newest leaves and the root zone before applying fertilizer. A soil test that includes pH, phosphorus, potassium, and soluble salts can prevent a guess from becoming an accumulation problem.
Settling: some settling is expected when the organic fraction decomposes and air spaces collapse. If the bed drops several inches after its first season, that is a sign the original mix contained a large proportion of unstable organic material or was not settled before planting. Refill with a measured blend, not compost alone.
Use a simple hand test: squeeze damp soil, release it, and break the ball with one finger. Then dig a small hole and inspect whether the sides are smeared, whether roots stop at a dense layer, and whether water is still present below the surface after irrigation. These observations tell you more about the next correction than a fixed “best soil ratio” can.
Climate changes the emphasis. In a wet garden, avoid adding more fine compost to a bed that already drains slowly. In a hot, dry garden, preserve water-holding capacity and use a surface mulch rather than making the entire bed excessively coarse. Raised beds can warm and drain faster than surrounding ground, so irrigation may need to be more frequent, especially during establishment and fruiting. That is a management consequence of the bed’s exposed sides and improved drainage, not proof that the soil needs constant amendment.
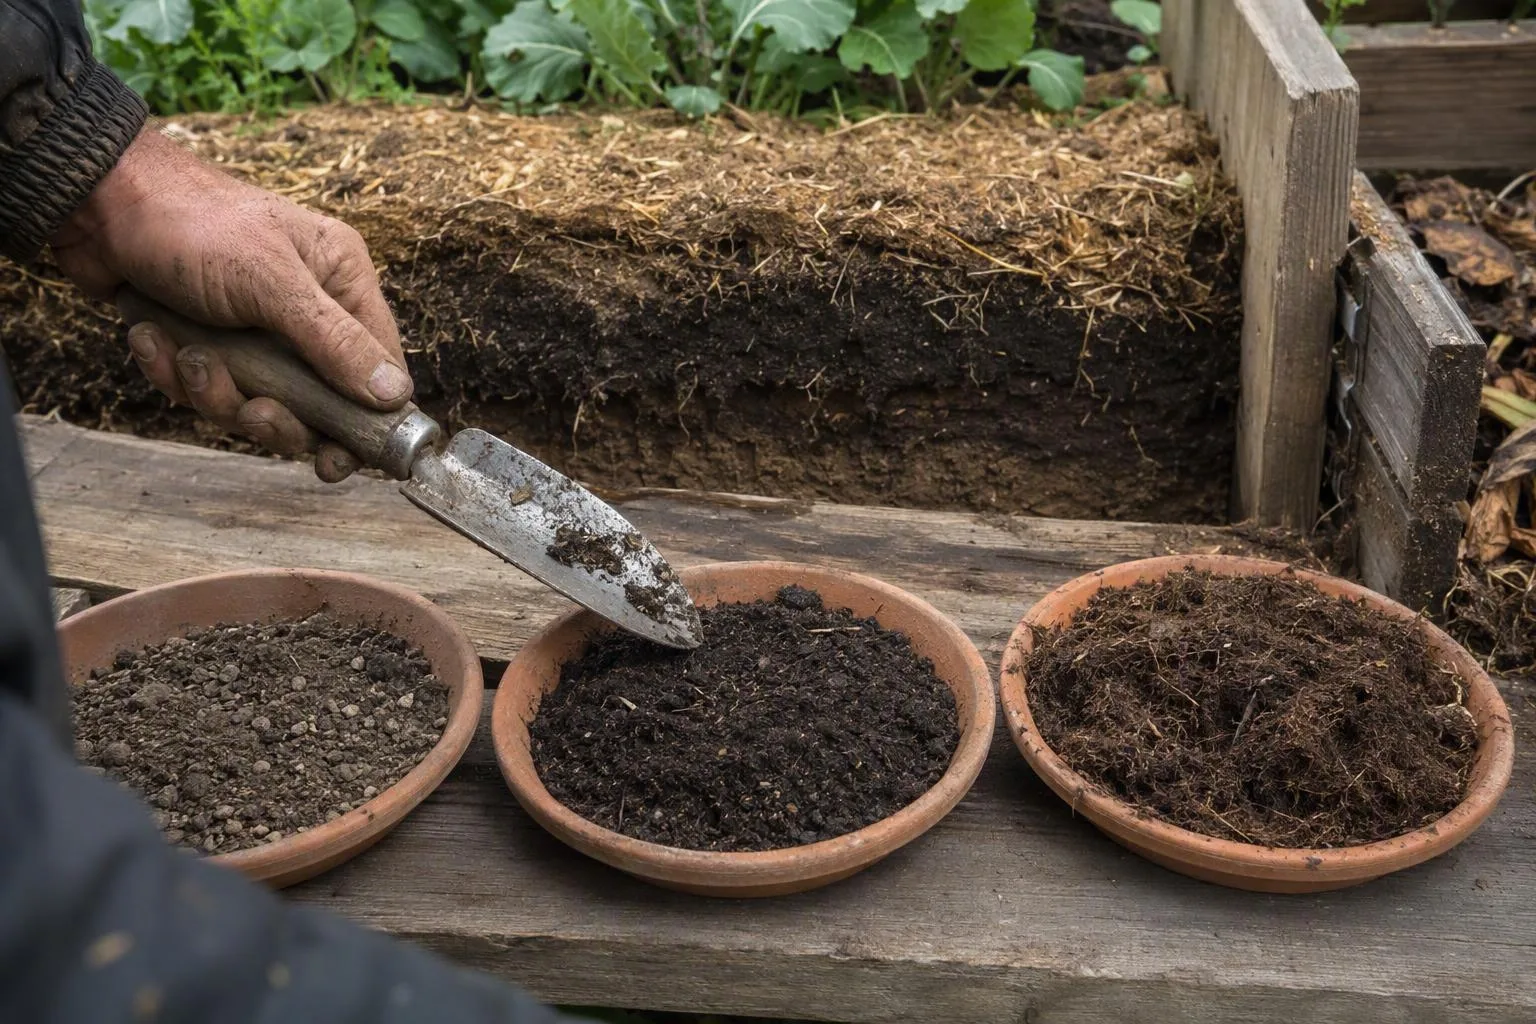
Visual intent: Show the diagnostic evidence of a wet, fine-textured mix beside a healthy crumb structure so the correction starts with observation.
Alt text: Opened raised bed soil shows wet smeared fines beside loose crumbs with visible air spaces.
Build It Once, Then Manage What the Bed Becomes Over Three Seasons
Construction determines whether the ratio has a fair chance to work. Remove perennial weeds first. If the bed sits on ground, loosen or fork the native soil where compaction is obvious, but don’t turn the whole area into a pulverized powder. The goal is a connected root zone, not a layered sandwich with a hard boundary underneath.
Blend the ingredients before planting. If the bed is large, add material in lifts no deeper than a few inches and mix across the lifts with a fork or rake. A visible stripe of compost above a stripe of topsoil will settle differently and can create abrupt wet and dry zones. Water the completed bed slowly, allow it to settle, then top it back up while keeping headspace for mulch. The surface should finish below the rim rather than spilling compost onto paths every time it rains.
A separate gravel drainage layer is usually the wrong fix for a raised bed sitting on soil. Water does not automatically pass faster from fine soil into coarse gravel simply because the gravel is underneath; the change in pore size can hold water above the boundary instead. Assess the native soil, open compacted ground, and correct the mix. The article Raised Bed Drainage: When the Soil Beneath Matters More Than Gravel covers that boundary problem in detail.
Landscape fabric also deserves a decision rather than a reflex. It can help suppress persistent weeds in some installations, but a solid barrier separates the new soil from the ground and can complicate root movement, drainage assessment, and future bed renewal. If the bed is on contaminated ground or an aggressive rhizomatous weed patch, a barrier may be justified; if it is ordinary workable soil, I prefer a clean, cultivated contact between the bed and the ground.
Here is the three-season maintenance plan:
- At construction: inspect each ingredient, blend the materials, wet the mix to settle it, and leave room for mulch. Record the approximate quantities so you know what went into the bed.
- After the first season: check the soil level, drainage, root penetration, and how quickly the surface dries. Add only enough blended material to restore the working level. If growth is poor, test before adding lime or fertilizer.
- Before the next main planting: add a modest surface layer of mature compost and work it lightly into the top few inches only if the soil test and texture indicate a need. Keep the deeper structure intact.
- Through the third season: use mulch to reduce evaporation and weeds, rotate crop families where it helps manage recurring pests, and avoid routine deep digging that breaks stable aggregates and disturbs roots.
For surface protection, use the practical guidance in Mulching Raised Beds for Moisture Control and Weed Suppression. Mulch is often the cheaper answer to a bed that dries too quickly, while more compost is often the wrong answer.
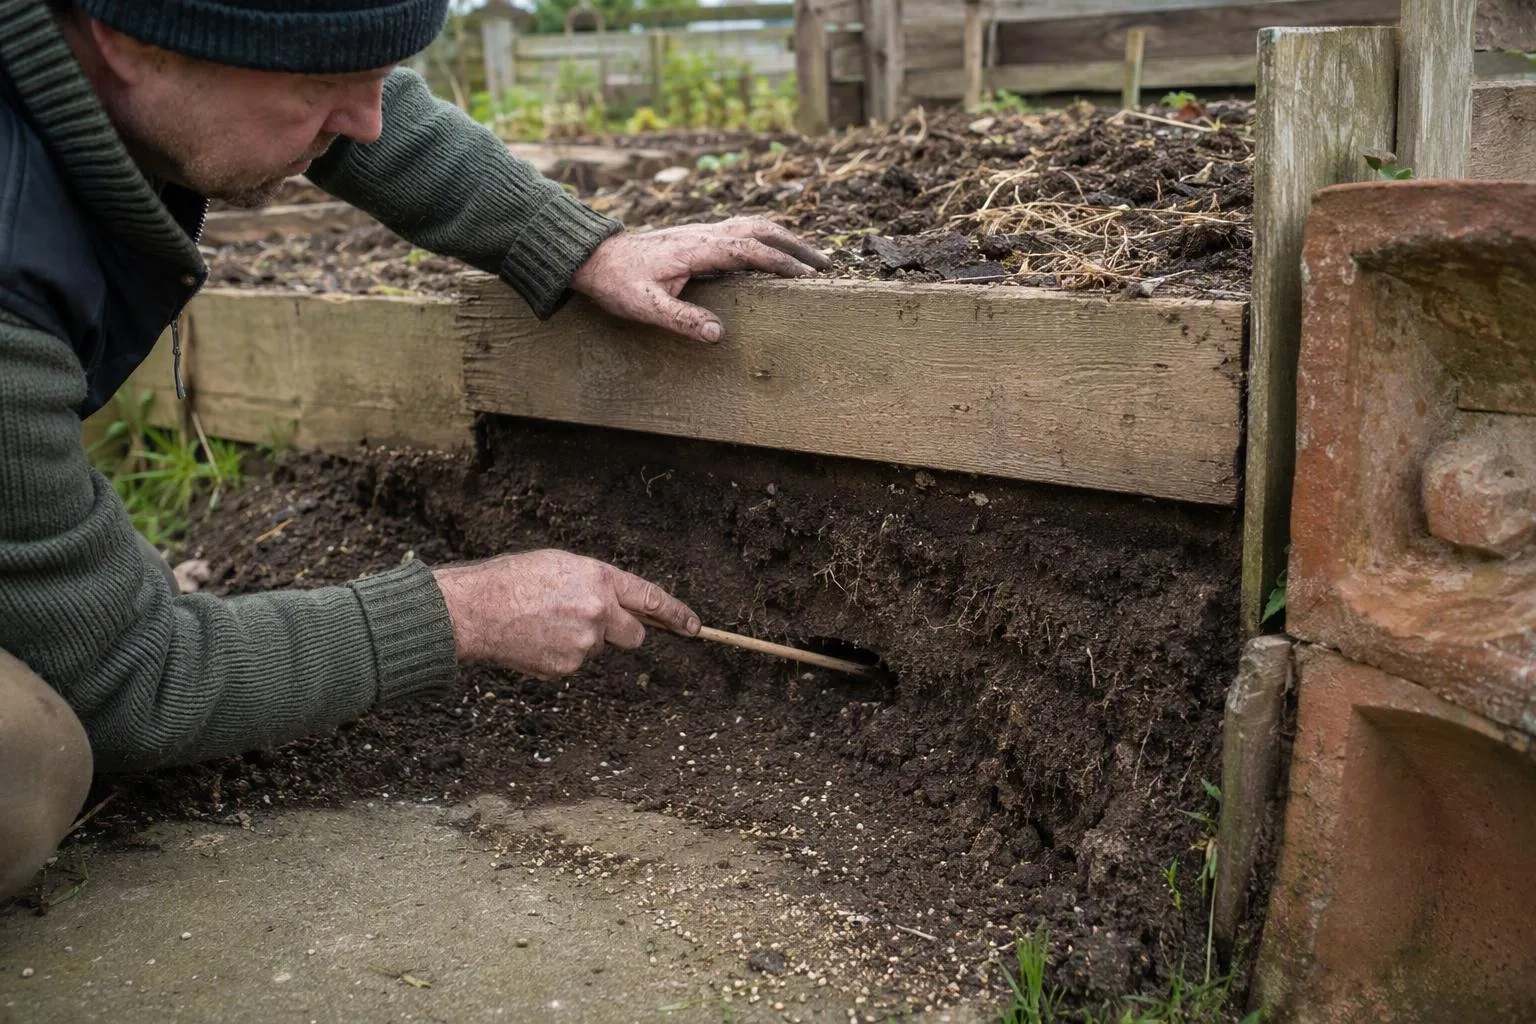
Visual intent: Show how the same bed changes from construction through settling to restrained annual maintenance.
Alt text: Three views of one raised bed show fresh fill, a lower settled soil level, and a thin compost top-dressing.
For edible crops, use finished compost from a source you can identify. Follow local guidance for raw manure, including the interval between application and harvest. Don’t treat manure as interchangeable with finished compost: its pathogen risk, nutrient concentration, salt content, and maturity are different. Wash harvested produce, particularly root crops and leafy vegetables, and keep fresh manure away from parts of plants that will be eaten.
The next decision is straightforward. Calculate the bed volume, inspect the materials you already have, and test the existing soil if symptoms or repeated poor growth point to a chemical issue. If the structure is sound, improve only the failing fraction. If the bed is dense, unstable, or built almost entirely from immature organic matter, rebuild the mix in measured lifts rather than trying to rescue it with one more product.
Frequently Asked Questions
Can I fill a raised bed with compost only?
No: compost-only beds commonly settle, hold too much water when fine-textured, and can supply excessive nutrients or salts; use compost as a component of a mineral-based mix and identify the exceptions for short-lived crops or temporary beds.
Should I put landscape fabric under a raised bed?
Explain that fabric is usually unnecessary over healthy soil and can restrict earthworm movement and long-term rooting; use cardboard or a barrier only for a specific weed, contamination, or aggressive-root problem, and address drainage separately.
How deep should soil be for tomatoes, carrots, and salad crops?
Give crop-specific practical ranges and explain that bed depth is not the same as root-zone quality: shallow-rooted greens need less depth, tomatoes benefit from a deeper unrestricted root zone, and carrots need loose soil below the bed as well as inside it.